ポップアップの表示
このチュートリアルに沿って学習するには、あらかじめ SDK をインストールし、cfx 入門を学習してください。
ポップアップダイアログを表示するには、panel モジュールを使用します。パネルの内容は、HTML を使用して定義します。パネル内ではコンテンツスクリプトを実行することができます。パネル内で実行したスクリプトはメインのアドオンコードに直接アクセスすることはできませんが、パネルスクリプトとアドオンコードの間でメッセージを交換することは可能です。
このチュートリアルでは、クリックしたときにパネルが表示されるウィジェットをツールバーに追加するアドオンを作成します。
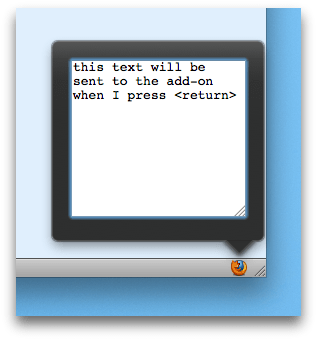
パネルには <textarea> 要素のみが含まれ、ユーザーが return キーを押すと <textarea> の内容がメインのアドオンコードに送信されます。
メインのアドオンコードは、メッセージをコンソールにログとして出力します。
このアドオンは、以下の 3 つのファイルで構成されています。
main.js:メインのアドオンコード。ウィジェットとパネルを作成します。get-text.js:コンテンツスクリプト。パネルの内容とやりとりします。text-entry.html:HTML で指定されたパネルの内容そのものです。
"main.js" は、以下のようになります。
var data = require("self").data;

// Construct a panel, loading its content from the "text-entry.html"
// file in the "data" directory, and loading the "get-text.js" script
// into it.
var text_entry = require("panel").Panel({
  width: 212,
  height: 200,
  contentURL: data.url("text-entry.html"),
  contentScriptFile: data.url("get-text.js")
});

// Create a widget, and attach the panel to it, so the panel is
// shown when the user clicks the widget.
require("widget").Widget({
  label: "Text entry",
  id: "text-entry",
  contentURL: "http://www.mozilla.org/favicon.ico",
  panel: text_entry
});

// When the panel is displayed it generated an event called
// "show": we will listen for that event and when it happens,
// send our own "show" event to the panel's script, so the
// script can prepare the panel for display.
text_entry.on("show", function() {
  text_entry.port.emit("show");
});

// Listen for messages called "text-entered" coming from
// the content script. The message payload is the text the user
// entered.
// In this implementation we'll just log the text to the console.
text_entry.port.on("text-entered", function (text) {
  console.log(text);
  text_entry.hide();
});
コンテンツスクリプト "get-text.js" は、以下のようになります。
// When the user hits return, send the "text-entered"
// message to main.js.
// The message payload is the contents of the edit box.
var textArea = document.getElementById("edit-box");
textArea.addEventListener('keyup', function onkeyup(event) {
  if (event.keyCode == 13) {
    // Remove the newline.
    text = textArea.value.replace(/(¥r¥n|¥n|¥r)/gm,"");
    self.port.emit("text-entered", text);
    textArea.value = '';
  }
}, false);

// Listen for the "show" event being sent from the
// main add-on code. It means that the panel's about
// to be shown.
//
// Set the focus to the text area so the user can
// just start typing.
self.port.on("show", function onShow() {
  textArea.focus();
});
最後に、「text-entry.html」では <textarea> 要素を定義します。
<html>

<head>
    <style type="text/css" media="all">
      textarea {
        margin: 10px;
      }
    </style>
  </head>

<body>
    <textarea rows="10" cols="20" id="edit-box"></textarea>
  </body>

</html>
演習:以下のように、「main.js」をアドオンの lib ディレクトリに保存し、他の 2 つのファイルをアドオンの data ディレクトリに保存します。
my-addon/
         data/
              get-text.js
              text-entry.html
         lib/
             main.js
アドオンを実行し、ウィジェットをクリックすると、パネルが表示されます。 任意のテキストを入力し、Return キーを押すと、コンソールに出力されます。
さらに詳しく
panel モジュールの詳細については、API リファレンス:panel(英語)を参照してください。
ウィジェットにパネルを付加する方法の詳細については、API リファレンス:widget(英語)を参照してください。